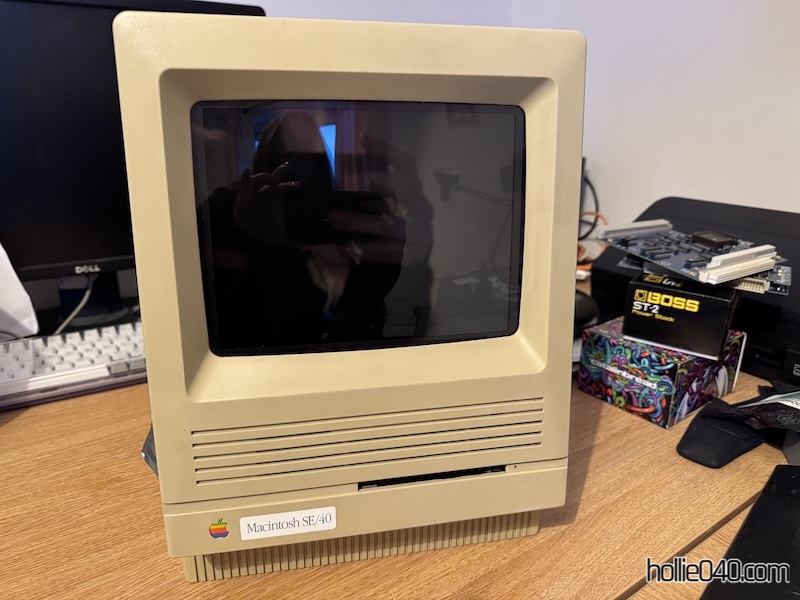
Fitting an LCD to a vintage Mac SE/30
I was lucky enough to be offered a chance to get a complete kit to convert my beloved Macintosh SE/30 from it’s standard black and white 9" CRT screen to a colour LCD of the same dimensions. So of course I said yes.
Why would I do this?
A couple of reasons.
- This removes some components that could potentially fail, and replacements are now getting difficult to maintain. Examples of this is the flyback and other components on the analogue board, and the CRT itself.
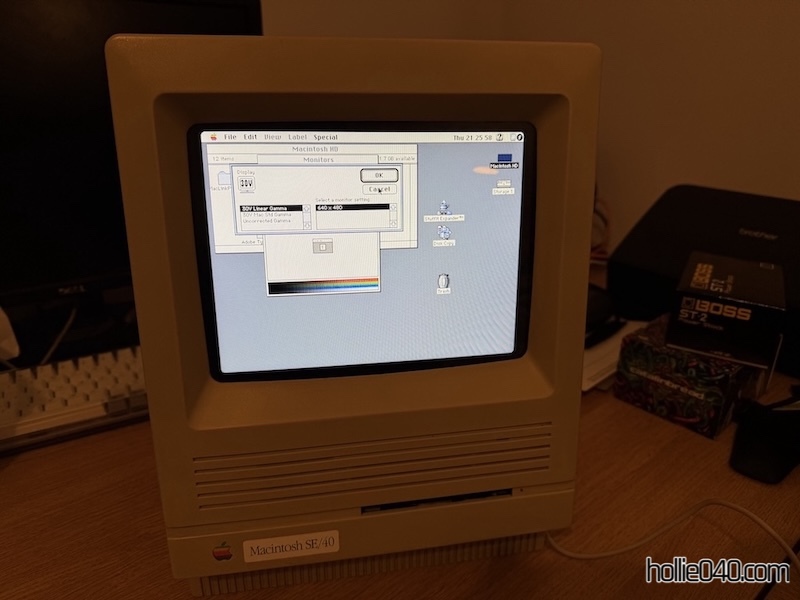
- It turns the machine into a Colour Classic, but with better build quality and considerably better performance. Additionally, the LCD runs at 640x480, so I get better resolution too into the bargain.
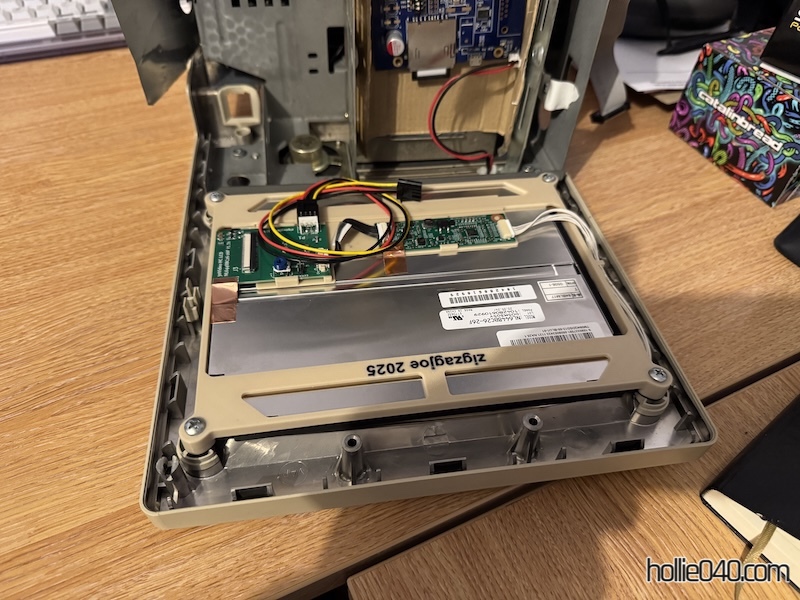
What’s in the kit?
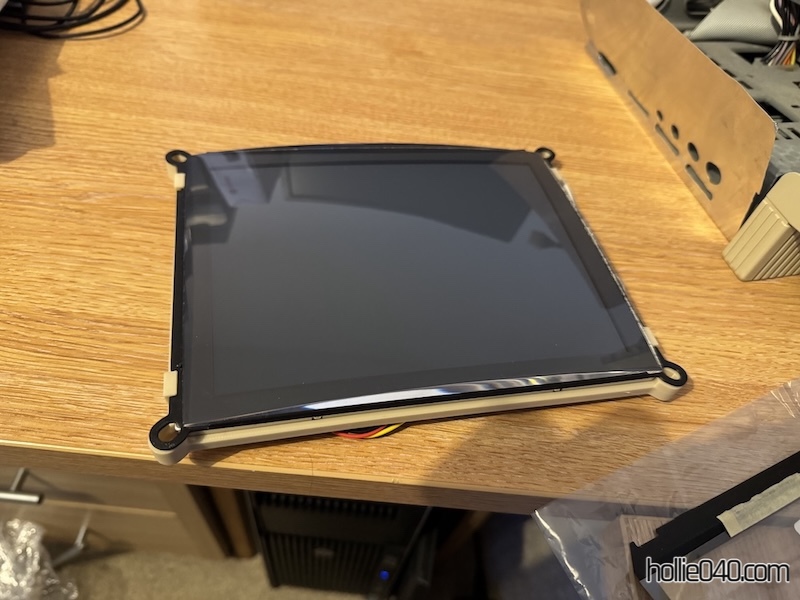
- LCD screen
- PDS graphics card
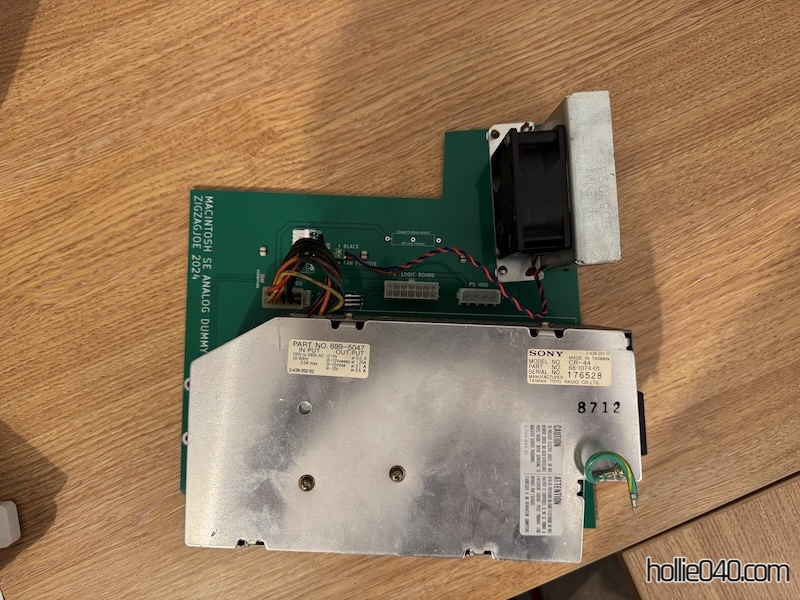
- Replacement analogue board
- Bracket to mount the LCD
- Cables to connect everything together
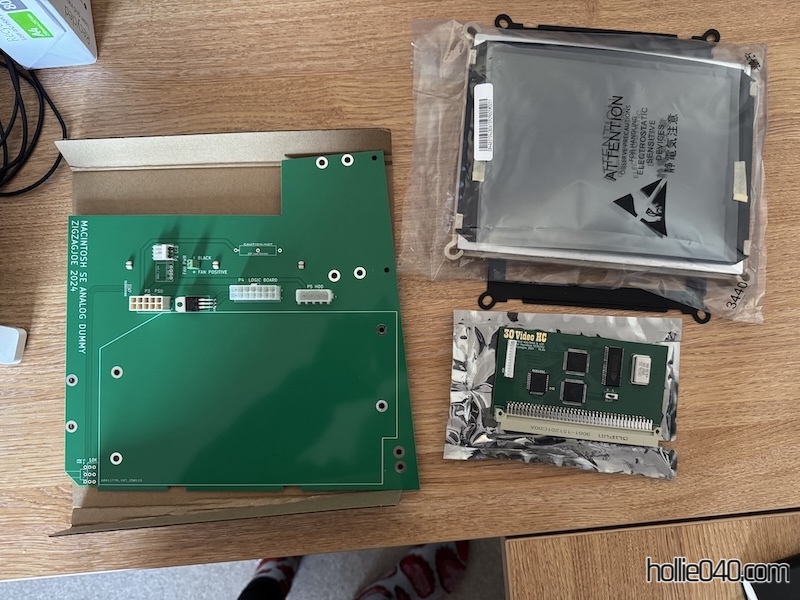
Additionally, I got an optional extra from a separate supplier; an acrylic ’lens’ that fits over the front of the LCD, which protects the screen and helps the aesthetics when mounted into the case.
Installation process
-
First thing to do is to remove the analogue board (with the fan and power supply attached) and CRT screen from the machine.
-
Move the power supply and fan onto the replacement ‘analogue board’. This will require desoldering the fan from the original analogue board, but it’s only two wires. These are then screwed into the the fan terminals on the new board.
- Fit the screen to the machine, using the supplied longer screws, as once again the originals are too short. In my case, at this point I also installed the plastic ’lens’ too. Take some time with this to make sure it’s level and straight in the bezel.
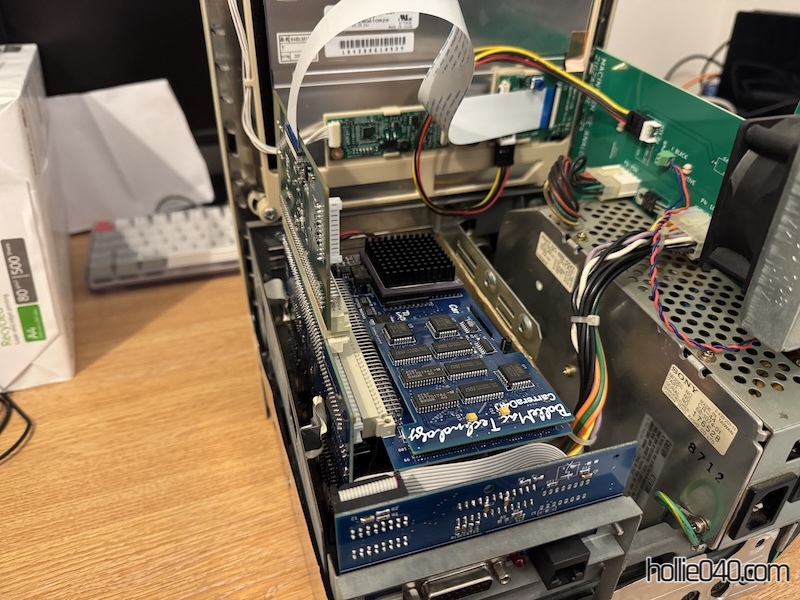
- Fit the new analogue board back into the machine. Hook up the logic board and screen power cables. Install the PDS card, in my case I’ve installed it on top of the adaptor card that also allows me to have my Carrera040 accelerator. Connect the ribbon cable from the screen to the PDS card.
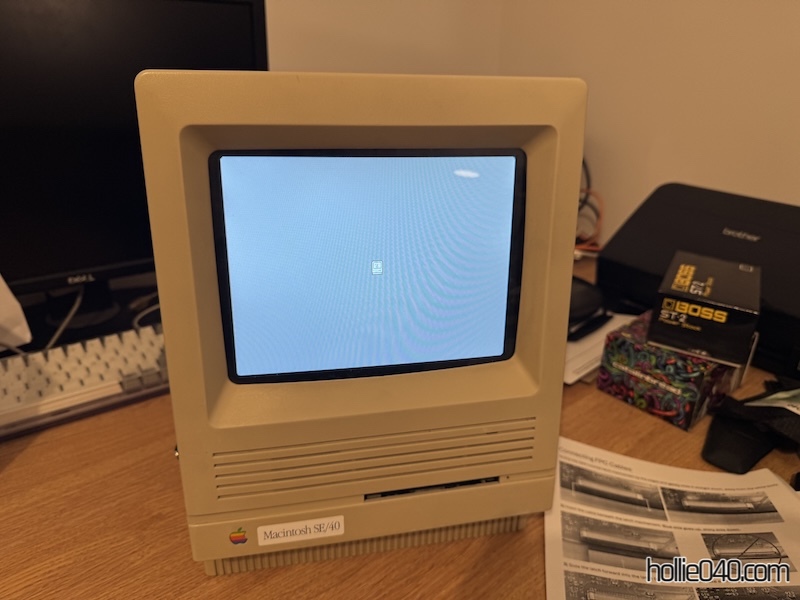
- Power it on. Assuming everything is connected properly, it should power up and you should see the happy Mac on the screen.
What’s it like?
On the first boot, the first thing that struck me is how bright the screen is, it’s claimed to be 900nits and I believe every word of that.
After that, if you’ve used an SE/30 or any other monochrome compact Macintosh, you might find it a bit strange for a bit. I did, and two friends who also have plenty of experience with these things too also did. It takes some time to get over this, the fact that a compact Mac has a colour screen is strange for a while.
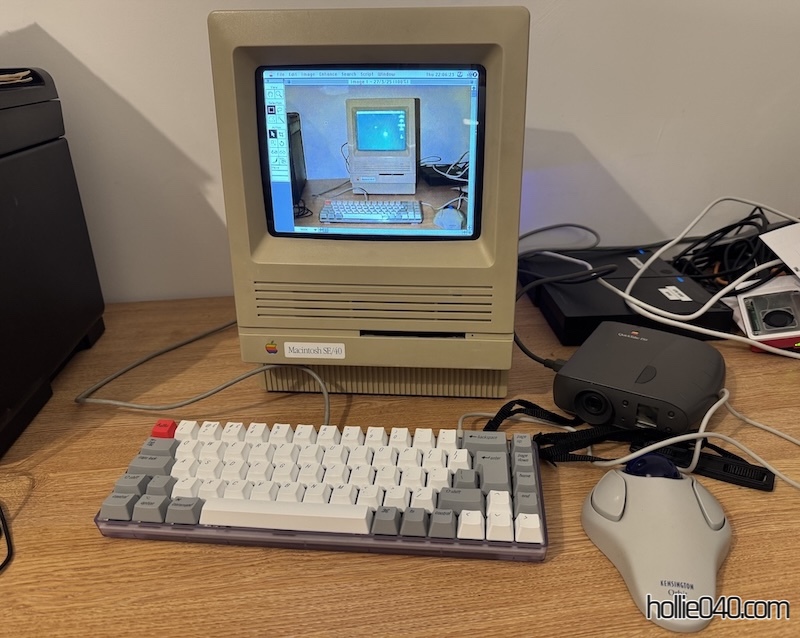
However, once you’re over that, it’s very fun. The 640x480 screen doesn’t sound like much, but it’s what you would have got back in the day from the lower-end models with a CRT, so it’s not too bad, and System 7 was designed for this too. For me, it makes the machine more useful (relatively, of course). For example, as shown in the first photo of this nonsense, I can use it with my QuickTake 150 and see the photos in colour now, and the extra resolution helps too as that’s also the resolution of images from the QT150 too.
I’ve had this for a few months now and it’s proven to be just as reliable as it was before this retrofit, so no problems with that. Hopefully it’ll continue that way, it does make me feel a bit less anxious about the machine breaking down because of CRT or analogue board/flyback problems which now can’t happen.
I want one! Where do I get one?
At the time of writing this, the creator of this kit doesn’t have a web shop presence (although I will update this in the future if he ever creates one. Therefore, the best way of getting hold of this is to keep an eye on this post on the 68KMLA forum. Of course, this is a one-man operation, so it’s up to him if/when he has any in stock or time to create them, so you might need to be patient depending on when you go looking.
Regarding the optional acrylic lens, these can be purchased from this Etsy shop, and then requesting a custom order, the guy will know what you want. Be warned though; they’re not cheap, I had to get over some ‘sticker shock’ originally. But again, I think it’s worth it.